Showing posts with label Sewing. Show all posts

Wednesday, March 4, 2015

Bowtie Onesies

After a crafting hiatus post Evie, I'm back in the saddle!

Two of the little boys in our small group family just turned the big ONE!! I made them little man onesies. 

I went back and forth over whether to attach the bowties directly to the onesie or use a snap so it could be removed during meals and washes. Ultimately I decided to use a snap as I felt it would ultimately hold up better. I'll have to ask the mommies in a few months to confirm. 

I think I prefer the shorter bowtie length on this one. 

For the 2nd one, I added buttons and made the vest longer and pointed. Not sure how that will look with pants on. Maybe a perfect excuse to go pants-less!  :)


Thursday, October 16, 2014

Ella's New Room

This last week we painted our current guest room to get it ready for Ella. We painted it the same grey as her current room, we had a whole unopened gallon in the basement.

We have decided to keep her in her crib for as long as possible. Right now she isn't climbing out, or really even thinking about it. She also plays nicely in her crib in the morning giving us a buffer on when we have to go get her. I'm not ready for her cheery-eyed wake up visits to my bedside at 6:30! 

Because she is staying in the crib - and it's a huge pain to move/disassemble, she will stay in her current room until Evie is ready for it and then we will figure out how to move her. :) 

Here is our painting party this week: 


Protecting Evie from the fumes: 

Finished product: 


Bookshelf Decorations:

(Owl made by Aunt Rachel)


(E made by Aunt Rachel)


(Owls from Aunt Lauren) 


(Keepsake box my mom made from Ella's NH baby shower

Made by Aunts Kate, Danielle, and Rachel for Ella's PA baby shower) 

Curtain: 

Made from the sane fabric as her quilt and high chair cover

We need to bring over her dresser and a few other items - so I'll add those later. 

Friday, October 10, 2014

2 hours 10 minutes

I wanted to make a small travel blanket for the car. It took me 2 hours and 10 minutes.

I had already cut up the strips of fabric for the full quilt, so that definitely speeded up the process! 

Sewed together 5 strips: 

Cheated and just folded in half and cut with scissors: 

Stacked them on top of each other: 

Added batting. I was using all left overs so I had to piece together 4 strips: 

Laid the flannel over it and cut around, cheating again. Pinned the 3 layers together, making sure to secure all the batting strips: 


Sewed through the layers with matching thread, and had to do it more frequently to secure the batting. 


Trimmed up and added the binding. 


Wednesday, October 8, 2014

Evie's Quilt Complete!

With a huge checkbox on my to do list, I'm happy to share the finished project.

Since I've last updated I've added the back, batting, and binding. 

[previous posts: 
http://gillespietreehouse.blogspot.com/2014/09/chevron-quilt-front.html?m=0

http://gillespietreehouse.blogspot.com/2014/09/quilt-progress.html?m=0

http://gillespietreehouse.blogspot.com/2014/09/chevron-quilt-begun.html?m=0]

BACK: 
I decided to go with a flannel, and found a perfect match to my coral. Flannel does shrink so pre-washing is a must. Because I seem to insist on always straying from a pattern, my quilts unconventional size (48x52) required a pieced together back. 

I chose to sew it into 4 equal vertical stripes, leaving me with 3 seams. 

BATTING: 
I decided to do two layers of batting to get a thicker warmer blanket. I used two packages of Warm & Natural. 

On my previous quilt for Ella I felt like the batting wasn't secured very well, so I decided to sew the back to the batting before combining the entire quilt. 

I sewed in the "gutter" of the 3 vertical seams in the back flannel. This way there were no extra seams/lines. 

Once these pieces were sewn together, I found it much easier to combine the whole quilt because I really had 2 pieces rather than 4; much less to worry about. 

I attached the front of the quilt with coral thread, so I sewed over my coral fabrics so it wasn't as noticeable. 


I started in the center of the quilt (middle row and middle of that row) and worked my way out. So for the middle of the quilt that meant I started in the middle and went to the left and then went back to the middle and went right. After that row was complete, I sewed a row 11 inches above the middle and then 11 inches below. 

When I was done the front was attached in 3 lines and the batting in 6 (3 to the entire quilt and 3 just to the back). 

EDGES: 

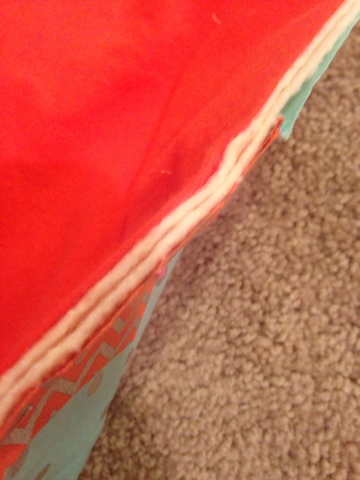
Now that everything was sewn together, I needed to work on the edge. Below is a picture before I did anything: 

I used my quilting foot and did a zig zag stitch over the edge. 


This step technically isn't necessary, but it makes the quilt stronger andi think it made adding the satin binding much easier! 

I used this tutorial for my binding, I recommend reading: http://m.instructables.com/id/Flannel-baby-blanket-with-satin-binding/step8/Attach-the-binding-mitered-corner/

I used satin binding for the first time, I'm pleased with how it worked out, and think Evie will like the satin and flannel. 

Pinning down and sewing the binding was the hardest part due to the meticulousness necessary. 


The corners were the most challenging, but the tutorial addresses that.

Finished edge: 

Completed: