Josh and I recently completed our first furniture re-finish project together. We really enjoyed doing it together; thankfully there are tons of great tutorials online to walk us through the process. Josh and I took seriously the saying "opposites attract" when we wed. We literally have no hobbies in common. Unless Mario Kart counts as a hobby. So, finding something that we both enjoyed doing and got to do together was fun.
However, we both agree, no more furniture projects for at least 6 months.
Over a year ago, my mom and I found the dinning room set on the side of the road. With great strategy and excitement my awesome Momma, helpful toddler and pregnant self frantically drove the various pieces of the table and 6 chairs home. Quite proud of our find we instantly began to dream of all the wonderful things we could do to refinish it, but reality set in and it began taking up space and collecting dust in our garage and basement.
Last spring, we sanded the table and leaf top, but our progress stop when we started the
deck redo.
So, when it came time for 2015 new years resolutions and planning for the year ahead, I was surprised when refinishing the table rose to the top of Josh's "To-do list". Over the long July 4th weekend we finally dove into the project.
Here is the table I found on Pinterest that inspired our redo:
My man sanding and taping up the table to center our stencil:
The chairs; we (Josh) did sand one chair in its entirety but it was a definitely a challenge and we didn't feel it would improve the finished quality enough to justify the work. So far, we still agree, but time will tell if that was a mistake.
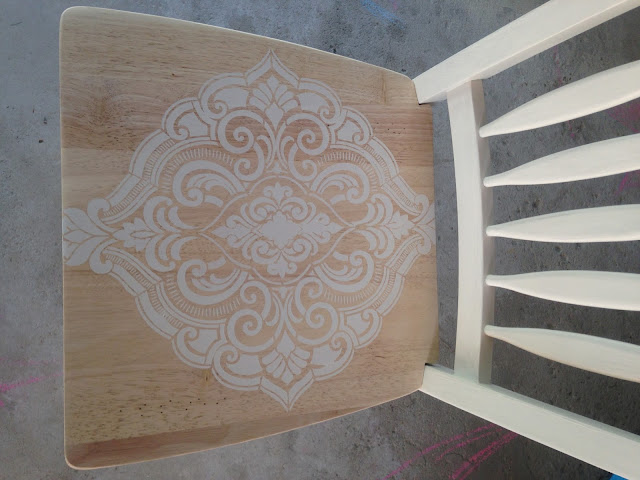
Here is the stencil we chose. Although I did love the paisley from the project we found online, I'm happy we went with this stencil for a few reasons. First, it's a little less hectic and overwhelming of a design and secondly, it was a lot less stenciling which in my opinion, as the stencil-or, was the hardest part of the project. I found it at JoAnns and with a coupon it was $10. I did purchase 2 of them, which proved to be wise as the stencil got sticky on the back which ultimately made the finished design less clear.
We started in the center of the table and worked our way out. It worked out perfectly that our stencil was just shy of 12 inches wide, and our table is 36 inches, so we were able to get 3 full columns on the table - it worked out perfectly.
I chose to use a spray adhesive to attach the stencil. Although the ladies at the craft store recommending going with the stencil specific adhesive, which was more like a glue stick, I'm glad we went the spray route. It saved so much time and created a great end result.
The first night we were able to get the leaf covered with the stencil. We momentarily thought about stopping after this, but we felt that extra work was worth it, I'm so glad we finished the whole table top.
The chairs were the Josh's baby. He decided to take the seats off, which made it easier to sand and stencil. We also were originally planning to stain over the stencil, and separating the paint and stain seemed easiest.
The original chairs were a cream color, which we mimicked, but it was distressed by time and design. We chose to go for a more pristine finish.
After one coat of paint:
The chair tops:

Chair reassembly:
The next weekend we planned to stain the wood; something neither of us had ever done. After painstaking picking the perfect color for the project, we obviously hated it once applied to our project. Such is the way with hours spent at Lowes.
Luckily, I had a sneaking feeling I was going to like the light wood better, and we tested on a scrap of wood rather than the real deal. So, our project came in under our 3-weekend estimate because we eliminated a step of the project, but hey, it still counts as a deadline beat in my book!
I think I just grew too attached to the stencil look, and after adding the stain the cream color of the stencil looked dingy and dirty to me.
Now it was onto the polyurethane step. This was also something new to us; cheers YouTube! I've used Rust-oleum products in the past and always been very happy with them, so we opted to use them again on this. We thought it went on really well. One thing we consistently heard about polyurethane is how many air bubbles you get, which leads to sanding between each coat. We got minimal bubbles, so were able to do 3 coats, sand by hand, and then add one more coat on top.
Chair assembly line. We also coated the backs and foot rests of the chairs to protect them from general use and rubbing.
Rookie mistake alert: We neglected to separate the leaf and sides of the table when doing the stencil and Josh had to use a knife to cut it apart after...so we definitely stretched out the table for the polyurethane. [tweezers pictured were used to pluck out the hairs from the stencil brush. This was my biggest challenge in the project, so I recommend buying a high quality brush when you stencil. I bought mine at Michael's and it was the only one I saw there or Joann's, so it might be worth a trip to Lowes?)
We hand sanded the table and chair tops to get a nice finish on all. We took it a step further on the table, we found it more important for an extra smooth finish there rather than the chairs. So...we sanded a little more aggressively, then applied wax, let it dry (slightly) and then buffed it off. The finished product: shinny and smooth!
We are extremely pleased with the finished project! Can't wait to have you over for a meal.


