Sunday, July 29, 2012

Out with the Old; In the with New

I grew up with an extremely crafty mother - so as motherhood approaches, I felt the need to increase my "craft factor." So, recently bought my first sewing machine, and have had a sewing project strewn all over the house since!

My most recent project was recovering the living room pillows. When we bought the couch 3 years ago, it came with the 5 pillows you see at the top. I never loved them, but this was the first time I had the power to eliminate them!

(Actually, buying non-matching random pillows and recovering them will save you a lot of money - and might be the way to go! You can get them cheap at TJ Maxx and Marshalls). 

I had recently updated the pillows on our bed and wanted do do some new designs. I loved the ruffle pillow from our bed so much, that I did do another ruffle (far right pillow in picture above) - however, this time I made the pillow double sided. So the part you see, is actually the back where the pocket to insert the pillow is.

The pillow all the way on the left - with the square-shaped design,  was my first attempt at making a covering that the pillow slides in from the top - not from the back. For all accounts it was easier - I wish I would have made the teal part larger in the corners - as it is now - I had to add a little Velcro to hold the flap down so you couldn't see the pillow inside.

For the middle pillow, I used muslin to lighten the color scheme up. The muslin was much lighter weight than my other fabrics, so I doubled up the fabric - and it worked much better.

What projects are you working on, or already completed you are excited about? 

Saturday, July 28, 2012

DIY Ruffle Pillow

I've gone a little crazy about pillows on Pinterest - and have since recovered the pillows on our bed and now the couch. I really loved the ruffle pillow ideas - and wanted to share the modifications I made.

Here is the tutorial I followed to get the gist of what to do. The one thing I found really confusing about her instructions is that when she is making her ruffles for her 12x12 inch pillows - she chooses to make the WIDTH of her largest ruffle 12.5 inches - without really explaining she just happened to be using all measurements of 12. (My pillow was much larger and it took me a bit to figure out that as long as I had enough material to work with to go from one end to the other - the width was up to me.)

After cutting your front piece of the pillow and your 2 back pieces in order to allow you to slip the pillow in, you will start working on your ruffle. Fun things first - determine (1) how wide you want your ruffles and (2) how many ruffles or layers of ruffles you want.

After you determine how wide you want your ruffles to be - cut strips of fabric by doubling the width of your finished ruffle and then adding another 1/2 inch. You are going to sew the fabric into a tube and then pull it right side out, so you need to cut your ruffle width double so you will end up with two layers of fabric and a 1/2 inch seem.

Make as many ruffle-tubes as you are going to want on your pillow. In the picture above with the green polka dots - I did 2 ruffles so I made the smaller one 1/2 the size of the larger. In the image on the right - I just chose to do 1 larger ruffle with not as tight of scrunching. (This pillow is actually double-sided - so the ruffle is on the "back" covering the pocket to slip the pillow in. On the reverse side is the green and blue flower fabric only - so I can do either side out on my couch.)

This next step - scrunching the ruffle tubes - I definitely recommend playing around on your machine and figuring out what is going to work for your project BEFORE you do anything to your ruffle tubes. You will want to play with your tension - I adjusted to the highest level - on my machine that is a 9. You will also want to make your basic basting stitch as long as you can - again, on my machine this was a 5. Now practice sewing through 2 layers of your fabric so you can get a visual for how much your ruffle tube is going to scrunch up. If it gets too ruffly you may not have the length you need to stretch across your pillow - so play with it so you will end up with the ruffles you want.

Once you are ready to make your final ruffles - iron them so the seem is in the middle of the back - and then stitch the length of your tube, the seem in the middle - and watch your ruffle be created before your eyes! (Note: different fabrics are going to work differently than others, so definitely think about that when buying your fabric. Cotton will do this much better than a thicker cloth). In the picture on the left - my fabric was a little thicker so it didn't want to scrunch with two layers - so I actually just used Fray Check along the edges and didn't sew them into tubes.

Now that you have your ruffles - pin them onto the front of your pillow where you want them. If you are going to layer them - sew them on in order from back to front. Once your ruffles are on - match up the front with your back panels and sew right sides together. Turn your pillow right side out - and enjoy!

Thursday, July 26, 2012

Nobody lays a finger on my Butterfinger

I've been trying to be better about making the recipes that I "pin" in Pinterest...so far I've only tried desserts, though. :)

Josh and I recently tried Butterfinger Blondies. They were easy to make, but we don't generally have Butterfingers on hand - so I did have to make a trip to the store. The recipe I used did include a frosting - we didn't make it, as we thought it would be overkill, but we didn't taste the Butterfinger as much as we thought we would - so I recommend trying the frosting!

The finished product was VERY sweet - it just didn't have the Butterfinger flavor I was hoping for. 

For the Blondies:

Ingredients

1 cup butter - room temperature
1 cup light brown sugar
1/2 cup granulated sugar
2 tsp vanilla
2 eggs
2 1/2 cups all purpose flour
1 tsp baking soda
1 tsp coarse sea salt
2 cups coarsely chopped Butterfinger Bars (approx 16 “Fun Size” bars) - I would maybe do extra if you are NOT going to do the frosting.

Instructions

Preheat oven to 350°
Cream butter and sugars in mixing bowl.
Add the vanilla and eggs and mix until incorporated.
On low add your dry ingredients (flour, salt and baking soda) until just combined.
Stir in your chopped Butterfinger.
Spread in a (greased) 9×13 baking dish and bake for 25 minutes (mine actually cooked for 35 minutes, so just watch yours) until center is JUST set.
Remove from oven and cool completely.

Preparation time: 5 minute(s)
Cooking time: 25 minute(s) 35 minutes

Tuesday, July 24, 2012

Is it worth it?

After living in DC, I realized splurging on some things is definitely worth it. Just the hassle of getting around the city alone led me to only grocery shop one place - it wasn't worth the drive to a different store to save 50 cents on strawberries. Now I don't go out and buy the best of the best for everything - but I don't guilt myself for spending a few extra bucks on a few nice things.

Growing up, I saw two different views of money -- my mom, a true British woman, scrimps on everything. I do mean everything. She even re-uses her tea bags! My mom goes to the mall every week - but only to a few stores - and only to look at the sale racks. She buy my niece adorable winter coats for $1.77! SERIOUSLY? She is very patience and willing to wait for the steal -  my father on the other hand, does NOT shop around for the best prices. He needs a new blue dress shirt - he goes to the store - and buys the nicest one there - and promptly leaves.

Unfortunately for my mother, and luckily for Josh - I HATE shopping. Similar to my dad - I go to the store only when I need something, I get that something, and I get out of there before the people at the mall make me crazy.

One of my "guilty splurges" is nail polish - I know - of all the silly things to spend money on! I just love having my nails painted - but hate when they chip and start to break - only leading me to have to remove and re-apply the nail polish or else look like a hobo for a few days - which is definitely a viable option now that I work from home. However, a few months ago, I discovered Essie nail polish - and I've been flying through my allowance ever since. :) Their colors are just so cute, and it stays on my toes for a month without chipping and usually a week on my nails - especially if I can convince Josh to do the dishes a few times! :) I highly recommend it - but beware - it does come with an $8 price tag!

What is your guilty pleasure? What do you splurge on?

Sunday, July 22, 2012

Snicker Salad

"They" say that when you marry someone, you marry their family -- obvious enough. I believe what they really mean is you marry their family's traditions, expectations, values -- AND recipes. When I first married Josh, he would say things like, "when my mom makes chilli...", "in my mom's recipe...." After navigating this landmine - we have developed a much better method to discuss cooking and I've worked to incorporate his mom's favorite recipes. (Which I do have to say - Chicken Rollups are to DIE for!)

One recipe I resisted, but now fully embrace, as a Gillespie - is "Snicker Salad." I know - it sounds weird, I thought, and still do think, the same thing every time I hear it! However - it is surprising amazing! Most importantly - it is really easy to make!

You simply need the ingredients in the picture. 3 Green Apples, Snickers bars, Crushed Pineapple, and Cool Whip.

1. Cut up your apples into small pieces - about a 1/4 of an inch - place into your mixing/serving bowl.
2. Similarly, cut up the Snickers. You could use any sized bar, but we went with Minis because they are already cut up a little! :) Add to apples.
3. Remove juice from your pineapple and add to the apples and Snickers.
4. Mix in the Cool Whip
5. Refrigerate and bring into room temp only when ready to eat. The Cool Whip will melt if you have it out for too long.
6. Enjoy - like a true Gillespie!

Saturday, July 21, 2012

Are you getting bigger?

Generally, this would be perceived as a rude question, but somehow when you are pregnant - your roundness is fair game. Luckily, I'm not quite large enough that strangers at the store are confident enough to ask when I'm due -- or touch my stomach.

I often wondered how I would be during pregnancy. Would I get a huge stomach or swell up everywhere, would I be ok with people touching my stomach, would I be a  person who shared every detail or didn't really discuss my pregnancy. I've discovered I'm definitely on the quieter side - very reserved about sharing information and details. I can only image my response when the first stranger asks to touch me - watch out!

So - enjoy these details, as they might be all you get! :)

When we found out we were pregnant, I wanted to do something to commemorate the process. Pinterest is definitely full of great ideas - but I also didn't want to go overboard - setting the bar too high that I would feel obligated and stressed by the project. Especially as the youngest in my family - I'm sensitive to being the child with no baby book, less pictures than the others, and wanted to be conscientious to be reasonable with all our kids.

I decided to take weekly pictures with a chalkboard that I made from an old frame - I'm highly considering doing monthly pictures in the future. :)

I have been feeling well - the first few months food didn't really sound appealing to me, so I ate a lot of cereal just to get food in me. Although I'm still not cooking gourmet meals, I'm finally eating again. I can't really say I've had cravings either. I definitely trend towards having dessert, which isn't something we normally have in the house. What were some of your pregnancy cravings?

I've always been a fan of peanut butter, and luckily for me, baby is too. I can tell a significant difference in how much the baby moves around after eating peanut butter. It is the best time for Josh to feel the baby kick, too! Although the kicking can be distracting and keep me up at night - I take each kick as a gift from the Lord - a little message, letting me know that my child is ok and is learning to move around. Thank you Lord for the miracle of life!

We have heard the baby's wonderful heartbeat 3 times - 157, 148, and 144. This little pounding is definitely the most joyful noise in the world! I simply can't get enough!

We are PLANNING to find out the gender of the baby. We had our anatomy ultrasound 3 weeks ago - but the baby was not sharing it's gender with us. As Josh says, the baby was being sassy, just like me, so hopefully we aren't in for the ride my mother had to endure with me! We do have another scan in August - so Lord willing, the baby will share it's gender with us. As my mom says, "It can't stay a secret forever, we will know by the end of November!" :) Can't wait!

Saturday, July 14, 2012

Chocolate on this and chocolate on that

I recently had my eyes opened to the wonderful world of chocolate covered potato chips - thanks Uncle Jeff and Aunt Mary Lou!

I'm definitely on board with the salty-sweet thing, and LOVE chocolate covered pretzels, I had just never thought of doing it with chips. Once Josh and I knew a better world existed, we couldn't stop craving them - so I made them this week for small group snack - they were well received!

The even better news - they are super easy to make! I just bought generic potato chips - the simpler the better, as you are going for just raw greasy/salty flavor here! :) Then I melted Ghirardelli dark chocolate on the stove.

I don't have a double boiler - so I just put a small mason jar in a sauce pan, added water to the sauce pan and added the chocolate chips to the mason jar.

Select your chips - dip them - and lay them on on wax paper. The chocolate on mine had a hard time hardening up - so I threw them in the fridge for 20 minutes and they were perfect!

Chips away!

Friday, July 13, 2012

Daddy's Girl

I know every little girl thinks they have the world's best dad - and we each should! God specifically placed us in our families for a reason, and gave us the earthly father who would shape our hearts to follow our heavenly father.

If you don't know my dad, you are missing out.

He is a wonderful man who showed me the way to follow the Master. I'm so thankful for the sacrifices he and my mother made to provide me with good examples, wonderful love, and a solid bedrock to build my life on. I never once doubted my father's love (not even when I cracked the dashboard on his car with a chocolate orange). I always knew he was "in my balcony," as he would say. He was always cheering me on, praying for me, and supporting me.

I believe there are 2 irreplaceable gifts a dad can give his daughter, I was blessed to receive both. I believe the best gift to give a girl is an example of true, godly, never-ending love for her mother - and I still enjoy seeing my parents together to this day. After 40 years of marriage, they are still in love, and demonstrate for me the life I want with Josh. The second gift I'm thankful I received from my dad is a clear understanding of a loving father - I know that the life my dad lived, the love he showed my family, and the sacrifices he made at every turn, led me to make the decision to spend my life with Josh. I know that Josh is going to be a loving, godly, and patience father to our children - and as so grateful I grew up an example of this love - so that I knew what to look for in a life partner.

Thanks Daddy, for all your have given me, taught me, and all the sacrifices you and Mom made that I don't even know about. I love you, happy birthday!

Who doesn't LOVE free?

I LOVE free stuff - free give-aways, free food, coupons, you name it - I love it! Today I discovered that Starbucks is giving away FREE tall "refresher" drinks. They have two new drinks - and you can try one TODAY between noon and 3pm.
I choose the "Very Berry Hibiscus." I did expect it to be sweeter than it is - maybe because it is fun and pink I expect a sweet summer lemonade-type drink -- and it is good -- it juts has a "spice" taste to it, rather than a sweet taste.

Try it and tell me what you think!

Thursday, July 12, 2012

Niagara in 3, 2, 1

Josh and I started July at Niagara Falls for our 3rd anniversary/babymoon. It was a lot of fun and definitely a great location for a low-key get away. We went up for a quick 3-day trip - so here is my 3-day guide to the falls.

Maid of the Mist - this was definitely worth every single penny! We didn't really wait all that long to get on - which was nice - but they do pack a lot of people the boat so there were definitely people stuck in the middle. Luckily Josh is tall and could see - and I was able to use my pregnancy to get next to a railing. Here are a few pics:
You can see the American falls behind me. I definitely never loved the American falls - they just seemed so boring compared to the Horseshoe falls - but being up close - they are amazing! I love the glorious look with the rocks below the falls.
Sadly, in this picture we don't really have the falls - but you can see the rocks. As we got closer to the Canadian Falls, it was crazy to feel the boat rocking and the great power of the falls. There was a good chunk of time where we weren't moving simply because we were going against the water.
 As you can see - the mist from the Canadian Falls was intense and really hard to capture. The sound was so consuming and magnificent! We didn't get a closer picture, because the camera was getting too wet. I definitely recommend taking the time to go on the Maid of the Mist - it was an awesome experience!


Oh yeah - you WILL get wet!

Dinner in the Skylon Tower - We had been looking forward to enjoying our anniversary dinner here for a while. We honestly expected the food to be mediocre, but we were surprised. Josh ordered the Chicken Cordon Blue and I got a steak!


The view was fabulous and allowed us to see all of Niagara as well as multiple angles of the falls. (You can even see a small rainbow!) 
 

Skylon Tower Arcade - After dinner, we saw the SHADIEST arcade of all time - and decided we just had to play Skee-ball. I love it - and Josh is genuinely amazing at it! I personally think his loooooooong arms aid in his amazing-ness at the game! After exhausting our greatness here - we moved onto racing games. Our recent obsession with MarioKart definitely came in handy here.
This is Josh's face after I drove his car off the course! :)

Journey Behind the Falls - this was definitely a cool experience - I do however recommend doing it BEFORE the Maid of the Mist. They are similar - but the Maid of the Mist will just blow you away. Basically there is a platform beside the Horseshoe falls that you can stand on - and get soaked on!

 Then there is a walk way with 2 lookouts behind the falls. These were really cool, and you could really tell how fast and powerful the falls are. (You will actually get more wet on this than on the Maid).

Casino - Neither Josh nor I know anything about casinos - but considering this was our "babymoon" we had to do things we knew we wouldn't be doing anymore - so we hit up one of the three local casinos. Honestly, it was a little overwhelming, and packed! We walked around for a while to get the lay of the land, and then decided to play the slots together. So we exchanged our $5 (which was surprisingly hard for us to give up - our Baptists-Pastor fathers should be proud) and began playing. At one point - Josh won BIG - we were up to $13 dollars.
At this point - I wanted to run and never look back - but Josh convinced me we should play our $5s out and just have fun. So - we continued to lose for the rest of the night! :)


Wednesday, July 11, 2012

Pillow Project #1

Since I recently completed Josh and my t-shirt quilt, I needed to select another project from my "before baby list." I decided to redo our bedroom pillows. I've never recovered a pillow before, so I wasn't sure how it would go - but it was a breeze, you can definitely do it! Picking out the fabric was the hardest part - and then selecting your patterns.

If you are willing to do the work, it is a great way to get your pillows for cheap because you can buy cheap ones at Marshalls or TJ Maxx.

Here is what our pillows looked like before I started the project. I didn't recover the tan ruffle pillow.
I finished one of them with flowers, as I talked about here. The second large pillow I wanted to have a ruffle up the front. I used this tutorial to make the ruffles. Once you get your fabric tubes made, adjust the tension and set your machine to the most basic stitch. After you get your ruffles made - carefully stitch them to the pillow, being careful, as your stitches will show. Once you get the hang of creating the ruffles, you can do lots of different styles and set ups.
For the remaining two pillows I just covered then with a simple envelope style with fun fabric.
Here is the final product - with all 4 pillows covered, and the tan ruffle pillow still included.


Easy Fabric Flower

I've recently caught the bug for Fabric Flowers, so when I decided to redo our bedroom pillows, I just had to incorporate a few. I wanted a good balance to combine onto one pillow - which led me to create my own flower as a compliment. So - here is my first attempt at a tutorial:

What you will need: 
6 circles of fabric - you can use scraps you have around the house - and make the circles any size you want - this will dictate the size of your final flower.
Thread - any color, you aren't doing to see it.
Glue gun

After you select the size of the flower you want - and therefore the size of the circles you are going to cut. Cut out 6 same-size circles. Stack your circles in 3 groups with the wrong side facing each other.
You are going to want to fold your circles in 1/2 and then in 1/2 again. You can choose which ever circle pattern you like more to have on the outside, as it will be seen more. Once your circles are folded - use a few stitches to hold it in place.
Do this to all 3 sets. Now you will want to interlock the 3 "fortune cookie" shaped petals together.
You flower is now complete - all you need to do is stick all 3 together and glue onto your pillow. You will be able to spread out your flower more or keep it tight - whichever works for you. Here is it attached to my pillow:


Wednesday, July 4, 2012

1 down 99 to go

After many lessons learned, late nights, and removed stitches - I have completed my first ever quilt! Josh and my memory t-shirt quilt is finalized and ready to be loved (although that will have to wait until the temp drops below 90 degrees!)

I love how this quilt incorporates both of Josh and my high school days, including Josh's plays and missions trips, my trip to Scotland and track meets. We both were able to include our favorite sports teams, the Browns and the Red Sox.

We met in our sophomore year of college in OB - and you can see 2 blocks that include our nicknames from the back of our shirts. While is college, Josh joined the Beta Sigma fraternity (upper right square) while I campaigned for freshman to "stay independent" (upper left square).

This is definitely a craft I recommend to other and I'm excited to enjoy it for years to come! And now to cross it off my "to-do before baby" list!

Monday, July 2, 2012

T-shirt Quilt

I grew up with a super-crafty mom. She was constantly disappearing onto the porch during commercial break and returning with a table runner or hemmed pants -- so, with motherhood just around the corner, I felt the need to raise the bar on my craft-factor.

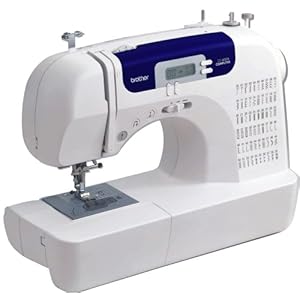
This led me to purchase my first sewing machine. After months of trying to convince my mom to give her machine to me and purchase a new one for herself, I finally gave in and purchased my own. I went with the Brother CS 6000i. As a short little review - I LOVE this machine. Honestly - anything that makes button holes deserves a rave review. Ive had a few issues with the bobbin getting jammed, but I seem to have worked out the kinks. (After showing my mom my machine - she went out and bought her own - so much for getting the old one for free!)

Naturally, after the purchase of my first machine, I created my to-sew list...and it is a little long. Topping the list of priorities, was a t-shirt quilt composed of Josh and my shirts from high school and college. I've always loved the thought of making a piece like this that commemorates our lives. I have enjoyed the process of making my first quilt and have learned a lot of valuable lessons. The biggest challenge of making a t-shirt quilt with 2 different people's clothes is that the images and sizes will vary dramatically. Josh's widest shirt was 4 inches widest than my skinniest shirt. This required me to sew extensions on my shirts. I do strongly recommend using interface on the back of the shirts - this extra sturdiness helps the process greatly.

Pictures to come soon!